

In the vast ocean of the internet, visibility is key. For your website to be found and understood by Google, establishing a direct line of communication with the search giant is crucial. This is where Google Search Console (GSC) comes into play. Think of GSC as your site’s health monitor, performance tracker, and communication channel with Google Search.
But before you can unlock its powerful insights, you need to verify that you own the website. This simple yet essential step confirms to Google that you are an authorized representative of the site, allowing you to access its private search data and configuration settings within GSC.
This article will walk you through the most common and effective methods to verify your site with Google Search Console in 2025, ensuring you’re ready to monitor, optimize, and improve your search performance.
1. Why Verify Your Site with Google Search Console?
Verifying your site is the gateway to invaluable data and tools that directly impact your SEO and overall digital strategy:
Performance Monitoring: See how your site performs in Google Search results (impressions, clicks, average position, click-through rate).
Indexing Issues: Identify pages that Google can’t crawl or index, allowing you to fix critical technical SEO problems.
Sitemaps Submission: Help Google discover all your important pages by submitting XML sitemaps.
Security Issues: Receive alerts about malware or spam detected on your site.
Core Web Vitals: Monitor your site’s performance metrics for user experience (LCP, FID, CLS).
Manual Actions: Be notified if your site has been penalized by Google for violating its guidelines.
Rich Results Monitoring: Track the performance of your structured data and rich snippets.
2. Choosing Your Verification Method: Domain vs. URL Prefix
When you add a new property in Google Search Console, you’ll be presented with two main options. Understanding the difference is key to choosing the best method for your needs.
2.1. Domain Property (Recommended)
This is the most comprehensive and recommended method.
What it covers: It verifies your entire domain, including all subdomains (e.g.,
blog.yourwebsite.com,shop.yourwebsite.com) and all URL protocols (e.g.,http,https,www,non-www). You only need one property for your entire web presence.Best for: Most website owners and businesses that want a holistic view without managing multiple properties.
Verification Method: DNS record. This requires you to add a specific TXT record to your domain’s DNS configuration (via your domain registrar).
2.2. URL Prefix Property
This method verifies only URLs under a specific prefix.
What it covers: Only URLs that start with the exact prefix you enter (e.g.,
https://www.yourwebsite.com). If you have bothhttpsandhttpversions, orwwwandnon-wwwversions, you’d need to create a separate URL Prefix property for each.Best for: Situations where you only need to monitor a specific section or version of a site, or if you don’t have access to DNS settings.
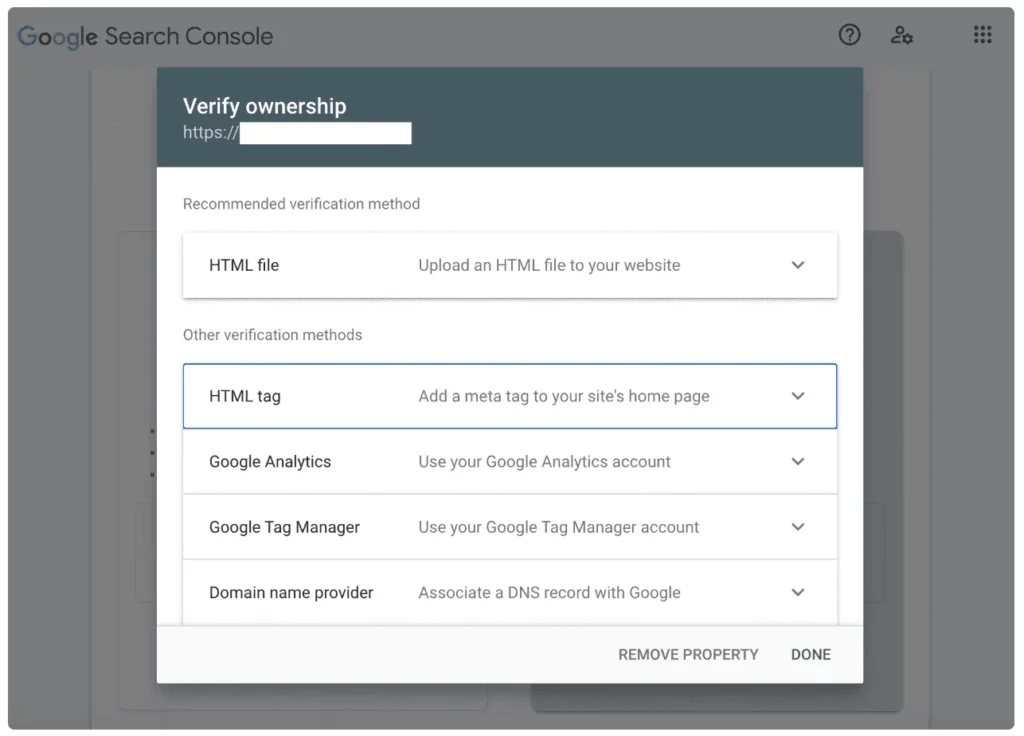
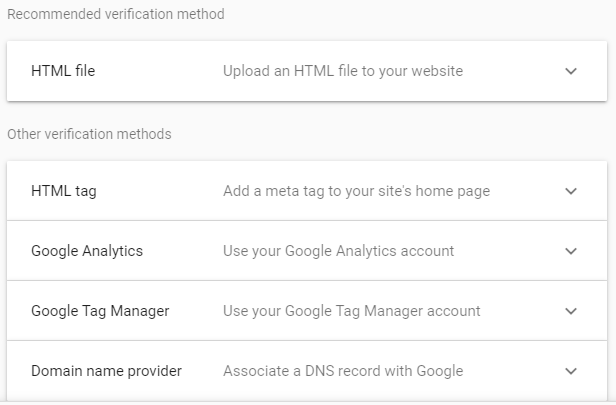
Verification Methods (multiple options):
HTML file upload
HTML tag
Google Analytics
Google Tag Manager
3. Step-by-Step Verification Process
Let’s walk through the most common verification methods.
Step 1: Access Google Search Console
Open your web browser and go to search.google.com/search-console.
Sign in with your Google account. Ensure this is the same Google account you use for Google Analytics or Google Tag Manager, if you plan to use those verification methods.
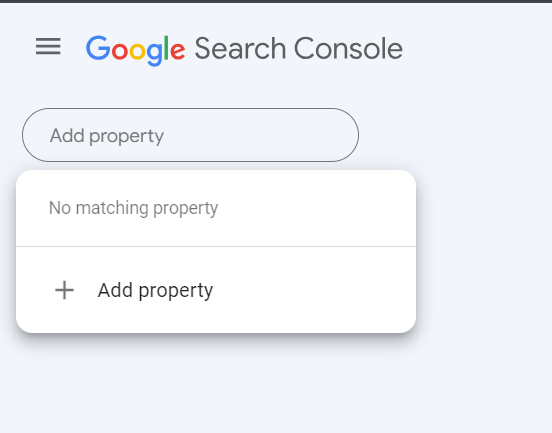
Step 2: Add Your Website as a Property
In the top-left corner, click the property selector dropdown (it might display an existing site or « Search property »).
Select « Add property. »
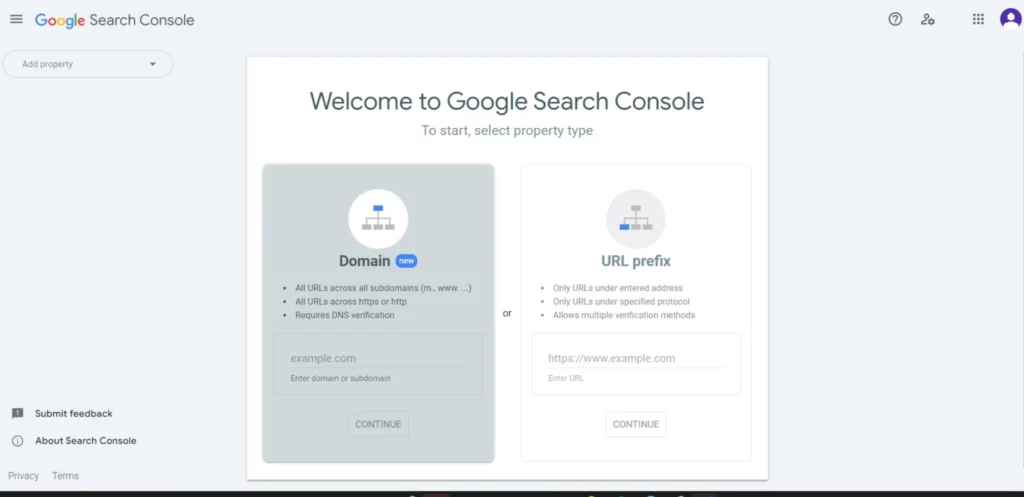
Choose your property type:
For Domain property: Enter your bare domain (e.g.,
yourwebsite.com) in the « Domain » box and click « Continue ».For URL prefix property: Enter the exact URL prefix (e.g.,
https://www.yourwebsite.com) in the « URL prefix » box and click « Continue ».
Step 3: Complete the Verification (Method-Specific)
Google Search Console will now present you with instructions based on the property type you chose.
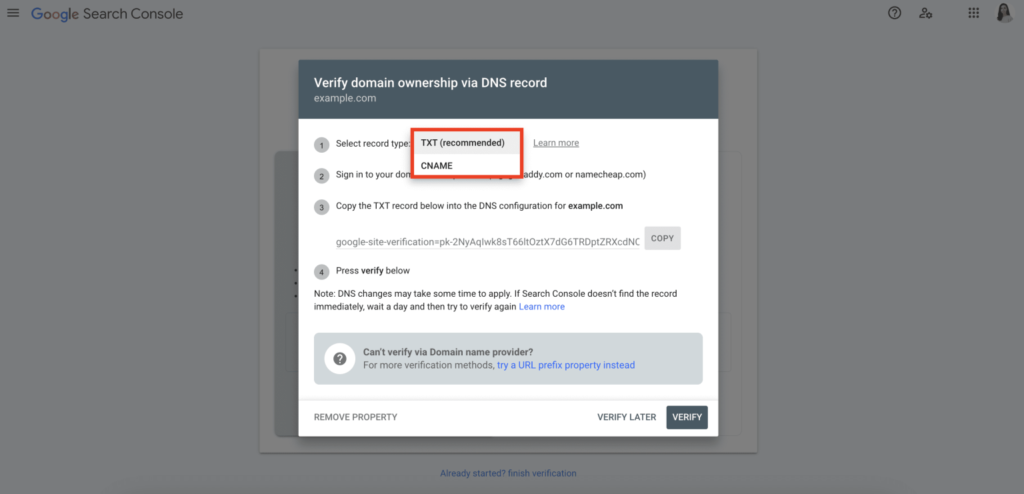
Method 1: DNS Record Verification (For Domain Property – Recommended)
This is typically the most robust method, but requires access to your domain’s DNS settings (usually through your domain registrar like GoDaddy, Namecheap, Cloudflare, etc.).
Copy the TXT record: In Search Console, under « Verify domain ownership, » you’ll see a unique TXT record string provided by Google. Click « Copy » next to it.
Access your Domain Registrar/DNS Provider: Log in to your domain registrar’s website (e.g., GoDaddy, Namecheap, OVH, etc.).
Find DNS Settings: Look for a section like « DNS management, » « DNS settings, » « Advanced DNS, » or « Manage Zones. »
Add a New Record:
Select « Add new record » or « Create new record. »
Type: Choose
TXT.Host/Name/@: Leave this field blank, or enter
@(check your provider’s specific instructions).Value/TXT Value: Paste the TXT record string you copied from Search Console.
TTL (Time To Live): Leave it as default (often 3600 seconds or 1 hour).
Save the record.
Return to Search Console: Go back to Google Search Console and click « Verify. »
Important: DNS changes can take a few minutes to several hours (up to 48 hours) to propagate across the internet. If verification fails immediately, wait a bit and try again.

Method 2: HTML File Upload (For URL Prefix Property)
This method requires FTP/SFTP access or access to your website’s file manager in your hosting control panel.
Download the HTML verification file: In Search Console, under « Verify URL prefix ownership, » click « Download file. »
Upload the file: Upload this HTML file to the root directory of your website. This is the top-level folder where your website’s main files (like
index.htmlorwp-config.phpfor WordPress) are located. Do NOT put it in a subfolder.Confirm accessibility: Google Search Console will provide a URL to verify that the file is accessible (e.g.,
https://www.yourwebsite.com/googleXXXXXXXXXXXXXXXX.html). Click on this link to ensure it opens in your browser.Return to Search Console: Go back to Google Search Console and click « Verify. »
Method 3: HTML Tag (For URL Prefix Property)
This is a good option if you can edit your site’s HTML header (e.g., via a CMS theme editor or a header/footer plugin).
Copy the HTML meta tag: In Search Console, you’ll find a
<meta>tag provided (e.g.,<meta name="google-site-verification" content="your-unique-code" />). Click « Copy. »Paste into your site’s
<head>section: Open your website’s HTML source (or your CMS’s theme editor/custom code section) and paste this entire meta tag within the<head>section of your homepage. It should be placed before the<body>tag.For WordPress: Use a plugin like « Header Footer Code Manager, » or directly edit your child theme’s
header.phpfile.For Shopify: Go to
Online Store > Themes > Actions > Edit Codeand findtheme.liquid. Paste the tag anywhere between<head>and</head>.For Wix/Squarespace: Look for « Custom Code » or « Tracking & Analytics » settings where you can inject code into the header.
Save changes to your website.
Return to Search Console: Go back to Google Search Console and click « Verify. »
Method 4: Google Analytics Verification (For URL Prefix Property)
This is the easiest method if you already have Google Analytics (UA or GA4) installed and use the same Google account for both GSC and GA.
Ensure the Google Analytics tracking code is properly installed on your website’s pages.
Ensure you have « Edit » permissions for the Google Analytics property linked to your website.
Return to Search Console: In the « Verify URL prefix ownership » section, choose « Google Analytics » and click « Verify. »
If the system detects a valid GA setup with the same account, verification will be instant.
Method 5: Google Tag Manager Verification (For URL Prefix Property)
Similar to Google Analytics verification, this method is quick if GTM is already correctly set up on your site with the same Google account.
Ensure your Google Tag Manager container snippet is correctly installed on your website.
Ensure you have « Publish » permissions for the GTM container.
Return to Search Console: In the « Verify URL prefix ownership » section, choose « Google Tag Manager » and click « Verify. »
If the system detects a valid GTM setup with the same account, verification will be instant.
4. Troubleshooting Common Verification Issues
Sometimes, verification doesn’t go smoothly. Here are common problems and solutions:
« Verification failed: Couldn’t find the verification meta tag / file »:
Check placement: Ensure the HTML tag is exactly in the
<head>section, or the HTML file is in the root directory.Clear cache: If you use a caching plugin on your CMS (like WordPress), clear its cache.
URL protocol: For URL Prefix, ensure you’re verifying the exact
https://www.yourwebsite.comif that’s your live URL.DNS propagation: If using DNS verification, wait a few hours (up to 48h) for DNS changes to take effect. Use a DNS checker tool (e.g.,
dnschecker.org) to see if your TXT record has propagated.
« Permission denied » (for GA/GTM methods):
Ensure you are logged into Search Console with the exact same Google account that has Edit permissions in Google Analytics or Publish permissions in Google Tag Manager for that specific property.
« Site unreachable »:
Check if your website is actually live and accessible. Is it down? Is there a firewall blocking Googlebot?
Ensure your robots.txt isn’t blocking Google from accessing the verification file or your site generally.
Conclusion: Unlock Your Site's Search Potential
Verifying your website with Google Search Console is a foundational step in any serious digital marketing strategy. It’s the key that unlocks a treasure trove of data and insights directly from Google, empowering you to make informed decisions about your SEO, content, and overall online presence.
By following this step-by-step guide, you’ve successfully established a direct line of communication with Google, paving the way for better visibility, improved performance, and ultimately, greater success for your website. Now, dive into the data, identify opportunities, and start optimizing!
Ready to enhance your website’s performance even further? Explore our articles on advanced SEO techniques, content marketing strategies, and leveraging Google Analytics 4 for deeper user insights.